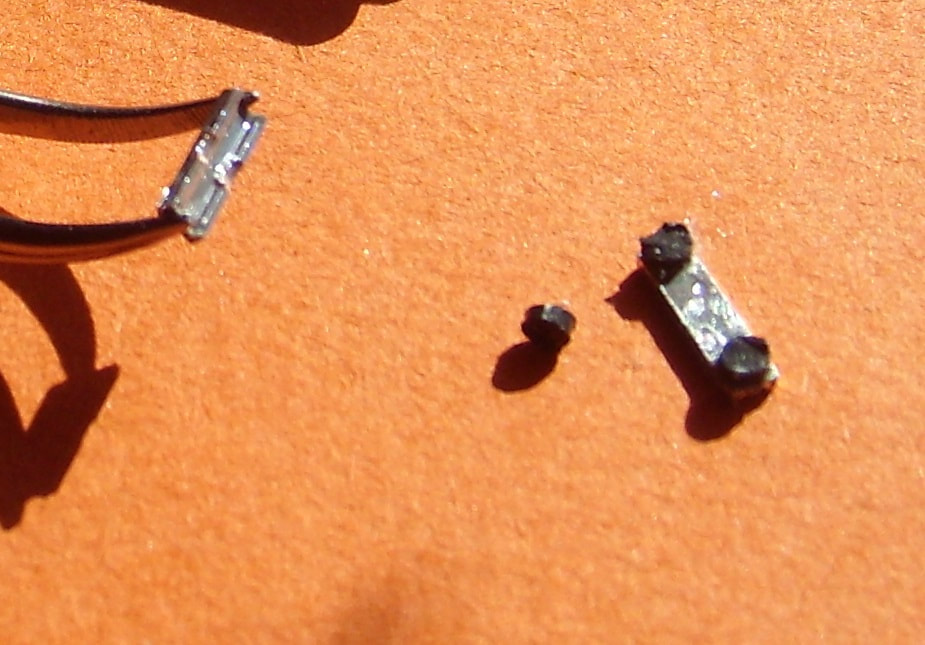
OK, Lets look at how to make tiny parts that improve the realism of the model. Left is the rear cross member mount. It holds the trans to the frame cross member. The tweezers hold another spare mount and the black dot between them is the shock absorber. The cross member is a piece of plastic channel that can be bought in hobby stores (and probably online). You don't really need channel as a piece of flat plastic could be used. You can use scrap plastic or even round plastic tree scraps. If you use a tree, file the end points to fit what you are mounting. Round cross members are fine.
You can see how small the parts are compared to the end of the tweezers at far left. The black absorbers are cut with a fine saw (shown it other parts of this site). They are smaller than 2 mm but bigger than 1/16th inch in diameter. Cutting them was done by holding the largest part of the tree steady and carefully sawing (quite slowly). Sometimes it is better to use a backward stroke with the saw as it removes a smaller amount of plastic and does not "jam" or bind. This works at the final cut through. Note that the tiny part will shoot away so some method is needed to capture it.
Once it is cut off, I used a black Molotow marker to paint it. Just use the fat tip of a marker to roll it around until it is all black (or as needed). I made 4 of them. Note that for best results, try to scrape the paint or chrome off at the point of contact. I glued them to the cross member by putting a tiny dab of glue on both parts and blowing on them gently so they get tacky. Then touch the cross member to the black dot. Try to push it around so the alignment is right. Be very careful as the glue will stick to your fingers and then the part will follow the stickiest thing it can. Probably your finger.
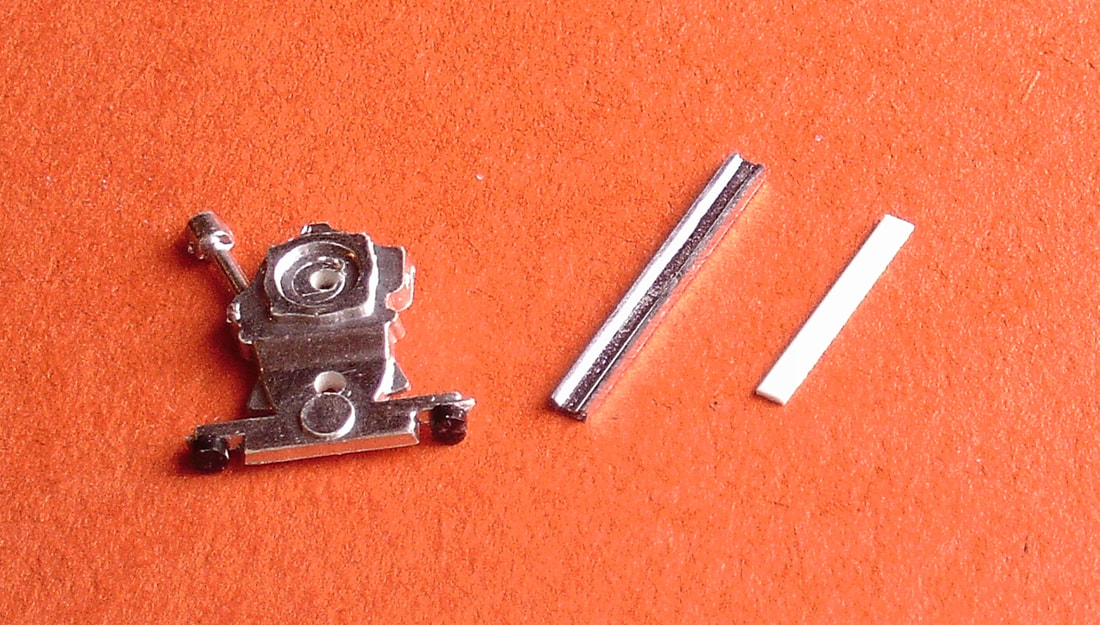
In the center picture above, the water pump assembly has the motor mount plate built in. All I needed to do was add the black mount dots. Glued on the same way but easier because the part is bigger so easier to handle. The channel next to it is already "chromed" and it will be the cross member to the frame. I made another cross member next to it out of flat plastic but I don't think I will use it.
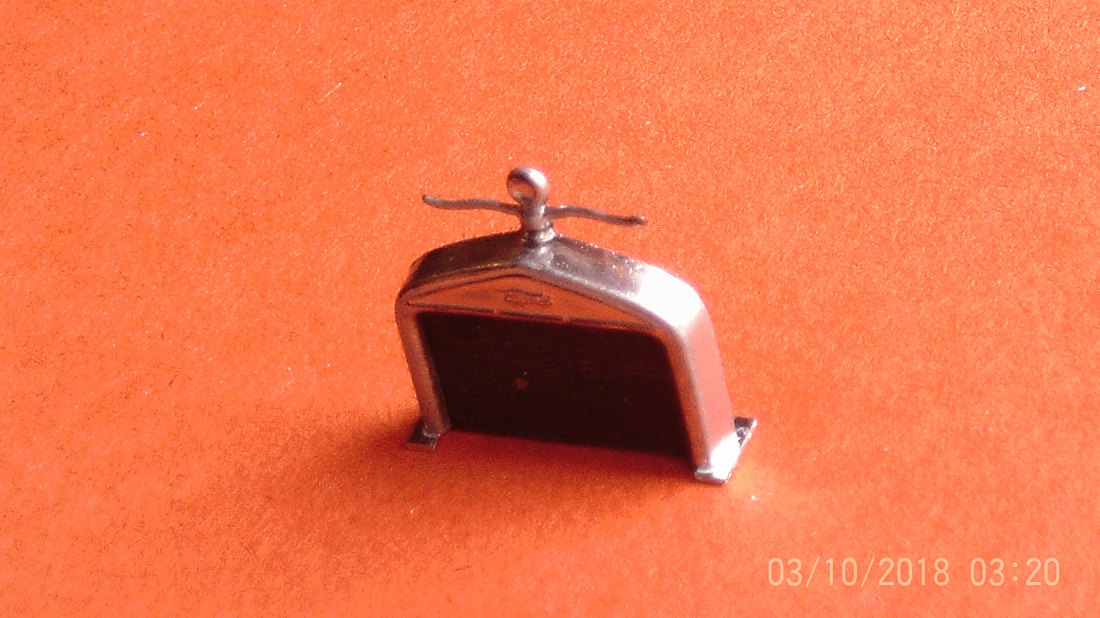
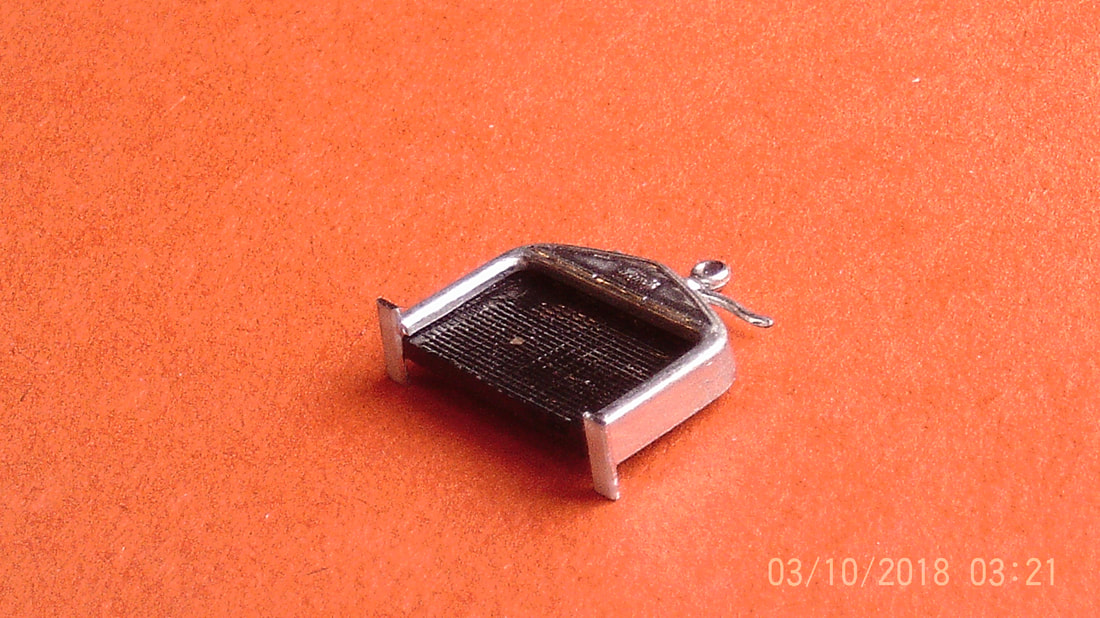
The final part is the radiator and shell. Finished, it can be seen above right. Below are 2 more pictures. If you look close, you can see 2 tiny "feet" at the bottom of the radiator. I made these from a piece of the flat plastic mentioned above. I took the long piece and glued the radiator shell end at a point where the overhang was correct on one side. Let it dry thoroughly and then do the other side. Then cut off the long ends to the proper length. Be very careful as the cutting will make the part jump (in both directions). After that, I painted it chrome. You can see the full radiator in the main Hot Rod article. The reason to cut it was I needed more room for the engine and tub. This gave me maybe 1/8th inch more room (maybe 3mm).
You can see how small the parts are compared to the end of the tweezers at far left. The black absorbers are cut with a fine saw (shown it other parts of this site). They are smaller than 2 mm but bigger than 1/16th inch in diameter. Cutting them was done by holding the largest part of the tree steady and carefully sawing (quite slowly). Sometimes it is better to use a backward stroke with the saw as it removes a smaller amount of plastic and does not "jam" or bind. This works at the final cut through. Note that the tiny part will shoot away so some method is needed to capture it.
Once it is cut off, I used a black Molotow marker to paint it. Just use the fat tip of a marker to roll it around until it is all black (or as needed). I made 4 of them. Note that for best results, try to scrape the paint or chrome off at the point of contact. I glued them to the cross member by putting a tiny dab of glue on both parts and blowing on them gently so they get tacky. Then touch the cross member to the black dot. Try to push it around so the alignment is right. Be very careful as the glue will stick to your fingers and then the part will follow the stickiest thing it can. Probably your finger.
In the center picture above, the water pump assembly has the motor mount plate built in. All I needed to do was add the black mount dots. Glued on the same way but easier because the part is bigger so easier to handle. The channel next to it is already "chromed" and it will be the cross member to the frame. I made another cross member next to it out of flat plastic but I don't think I will use it.
The final part is the radiator and shell. Finished, it can be seen above right. Below are 2 more pictures. If you look close, you can see 2 tiny "feet" at the bottom of the radiator. I made these from a piece of the flat plastic mentioned above. I took the long piece and glued the radiator shell end at a point where the overhang was correct on one side. Let it dry thoroughly and then do the other side. Then cut off the long ends to the proper length. Be very careful as the cutting will make the part jump (in both directions). After that, I painted it chrome. You can see the full radiator in the main Hot Rod article. The reason to cut it was I needed more room for the engine and tub. This gave me maybe 1/8th inch more room (maybe 3mm).
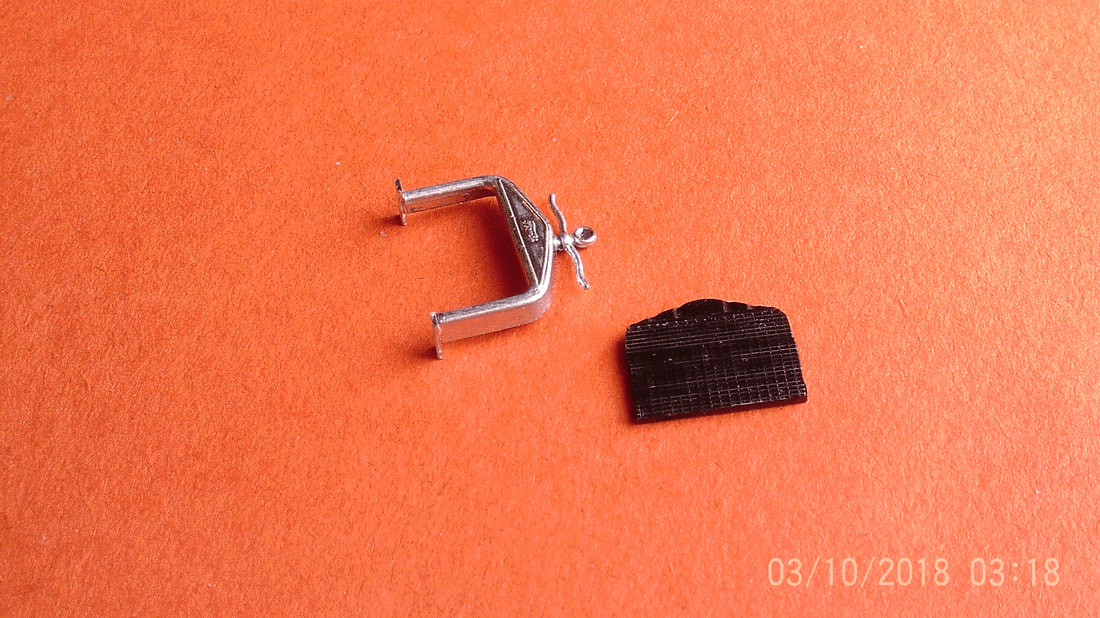
To make it more realistic, I should make a bottom "tank" on the black radiator so I can attach upper and lower radiator hoses later. There is already a tank on the top. Note that the fancy dudad on top of the radiator shell could be the water filler cap on a real car.
